Creating a Custom Keymap
This article will explain how to assign keymaps graphically.
1. Connect Cisne to the computer
2. Install Vial
3. Open VIal

The default keymap is displayed on this screen.
If an error message appears, please click the “Refresh” button in the top right corner.
4. Customizing keymaps
First of all, we will assign the Caps Lock to the blank key on the right bottom.
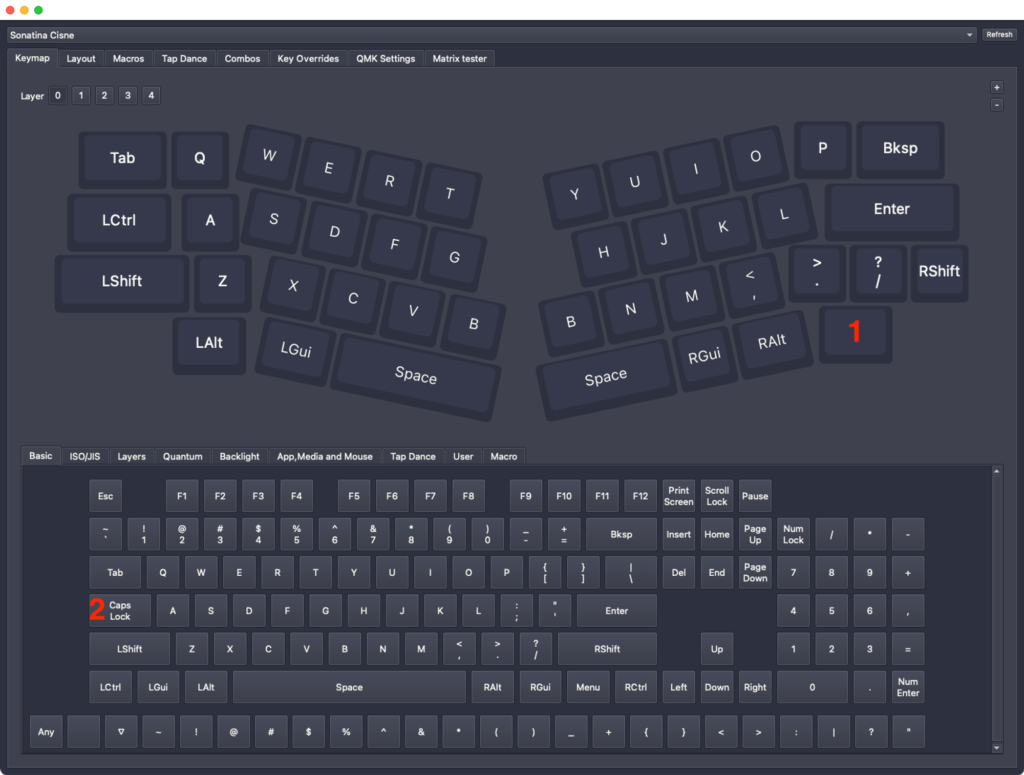
Press 1 then press 2.
That’s all.
Changing the keymap can be done in basically these two steps.
You might be wondering, “How do I assign symbols, numbers, and arrows to this?”
The answer is layers.
So what are layers then?
Think about the Shift, Control, and Fn keys on your keyboard.
When you press down one of these keys, it changes the function of other keys on the keyboard.
For example, pressing Control (or Command) + C lets you copy something.
That’s all. Layers are basically the same thing.
So how do we actually implement layers?
There are basically only two types of layer switching operations. Hold or Tap.
Holding is the same as Shift or Control.
Tapping is the same as Num Lock on a numpad. It’s like a toggle key that can switch layers without holding it down.
Let’s open the layers tab.
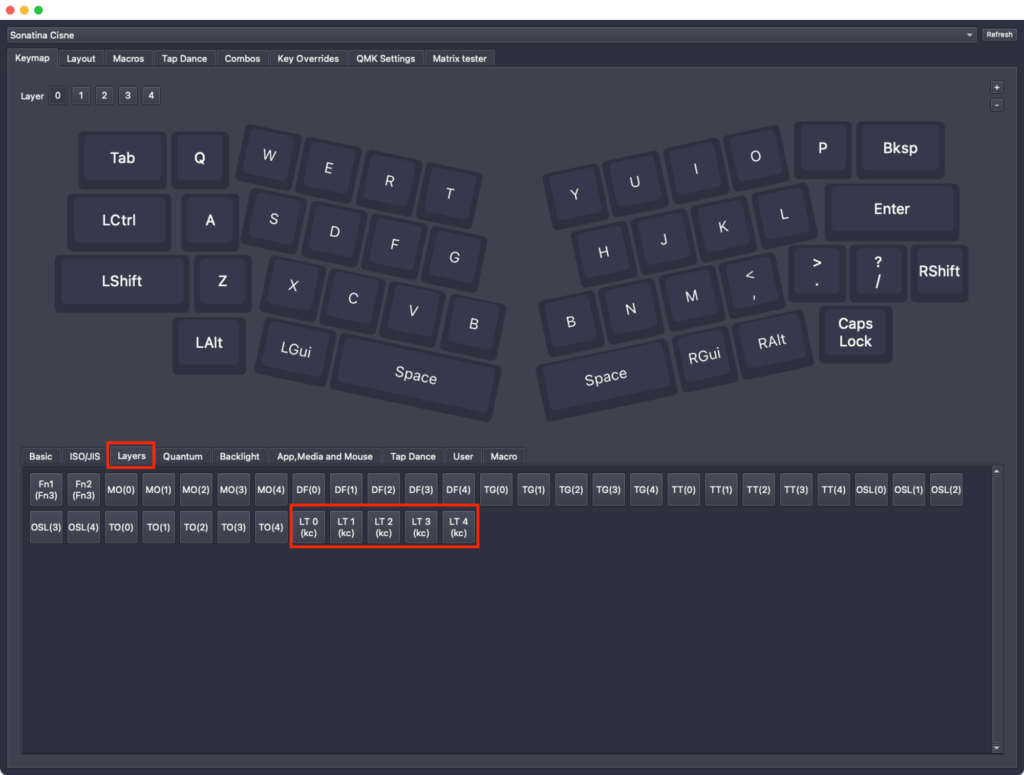
To keep things simple, we will only be using the LT function here.
For example, let’s try assigning LT 1 (kc) to the right Space key and assign Enter to it.
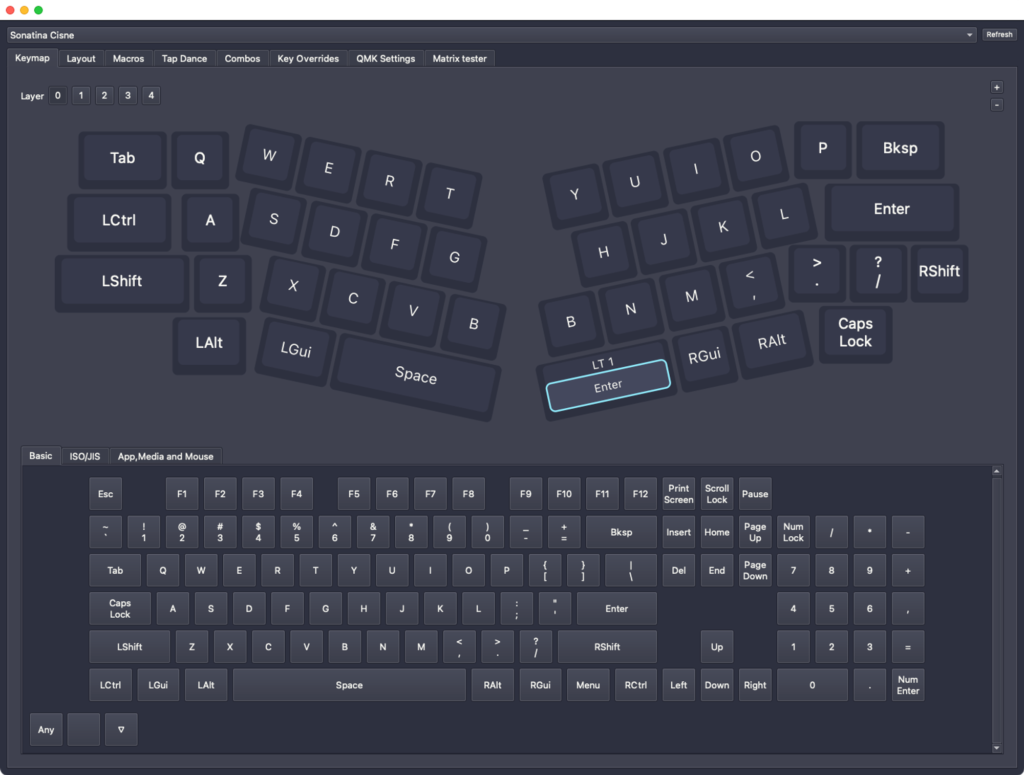
So what kind of function is LT in the first place?
It’s pretty simple;
– Hold down: Switch to layer 1
– Tap: Enter
It makes sense to assign a layer key to the Enter key because not many people hold down the Enter key.
There are a few good reasons for assigning layer keys to the thumb positions. Let’s break them down.
First of all, it doesn’t use your pinky finger like Shift or Control, so it doesn’t interfere with your other fingers.
Pressing the left Shift key with your pinky finger can be a pain. It restricts your hand movement and makes it difficult to reach the number keys to type the symbols.
Imagine if the shift key was located where your thumbs are. You could type uppercase letters and symbols from the number row without any stress.
That is what we’re trying to achieve by assigning layer key (LT) to the Enter.
Let’s switch to layer 1 by pressing the button with the number 1 in the top left corner.
This is called layer 1, but it is actually the second layer.
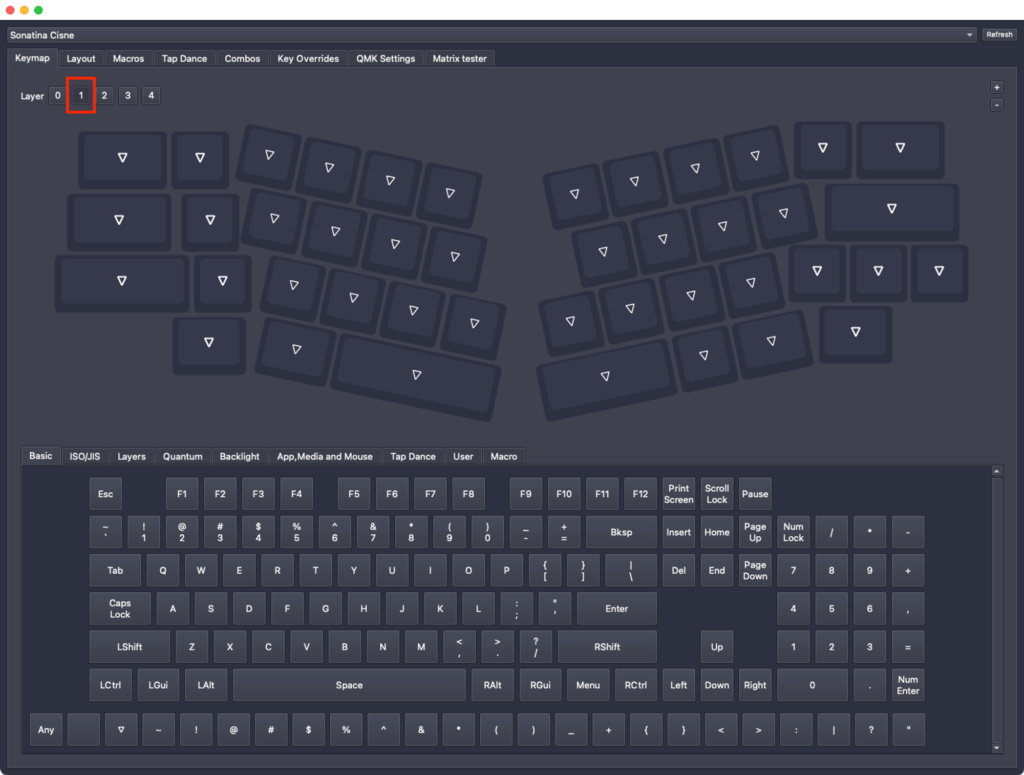
As you can see, nothing has been assigned to this layer yet.
How about we assign the numbers, symbols and Escape to this layer like this:

The way that keymaps are represented in the Vial interface is not very clear, so I will try using a different image.

We would also like to assign the function keys and arrow keys to this layer, but since there’s not enough keys, let’s assign them to the third layer instead.
We can assign these keys in the same way.
Let’s go back to the first layer and assign LT2(kc) to the left space, just like we assigned LT1(Enter) to the right space.
This is the same reasoning as the Enter key, as there are not many people who long-press the Space key.
Once we’re done with that assignment, let’s move on to the third layer.
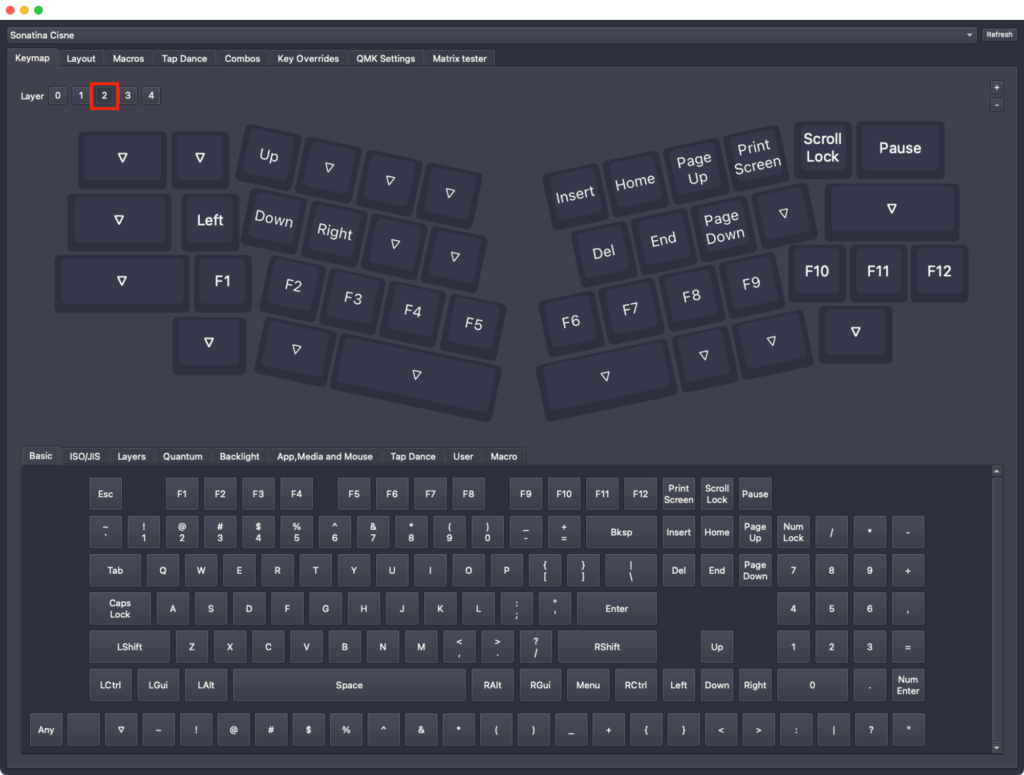
For example, if you want to enter arrow keys, hold down the Space key and press W, A, S, or D.
Okay, now we can input all the keys for now.
And now you have learned the concept of layers and can assign keys yourself.
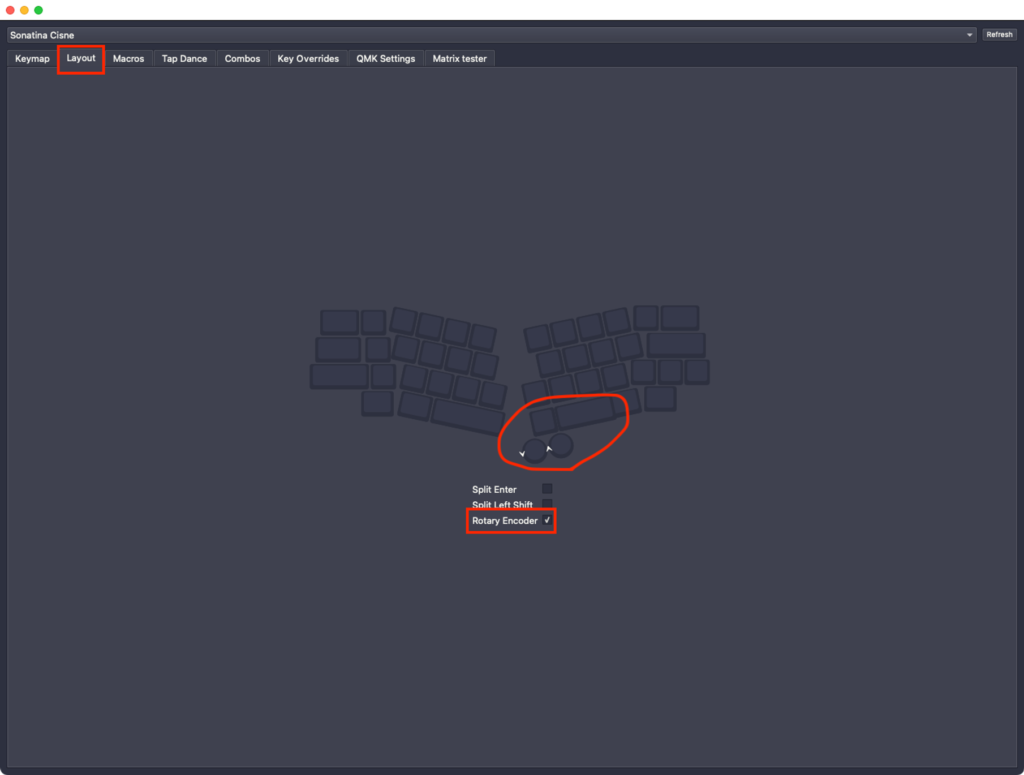
Oh, you want to use a rotary encoder?
Open the layout tab and check the rotary encoder box.
Then you will notice that a rotary encoder has been added.
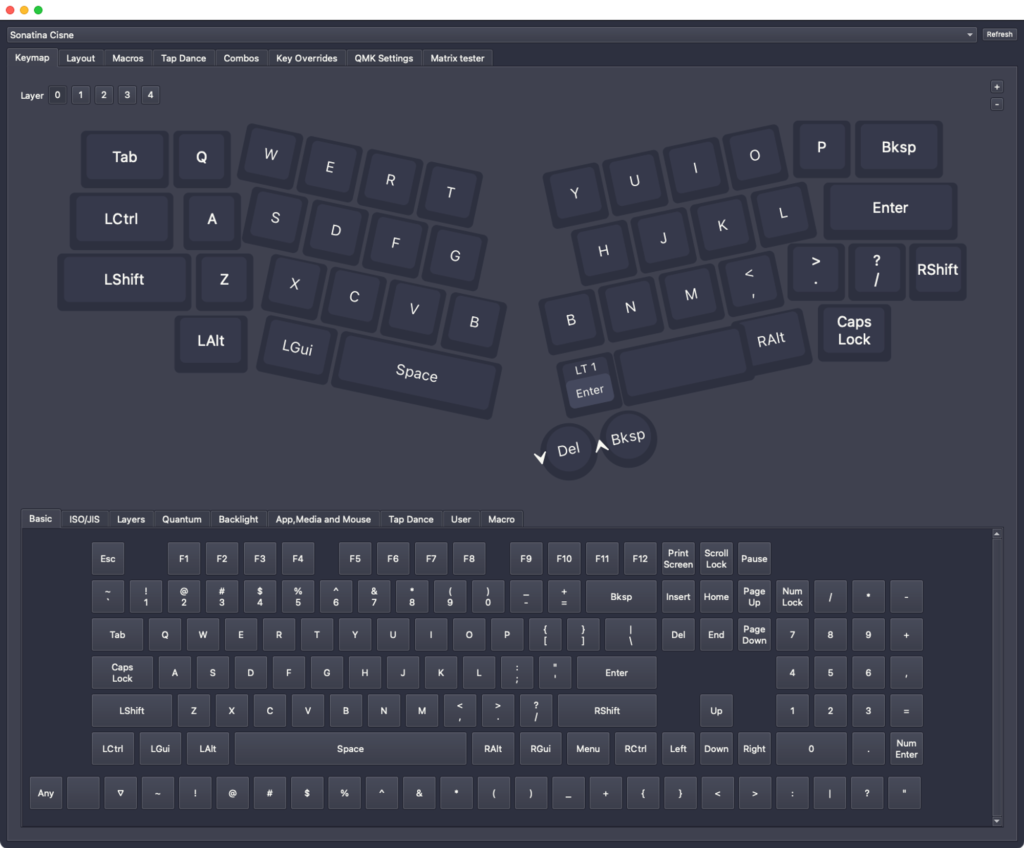
Let’s go back to layer 0.
By default, Left and Right are assigned to the rotary encoder, but you can also assign any key like this.
Now you can enter Backspace by turning the rotary encoder to the right and Delete by turning it to the left.
In this article, we learned the basics.
In the next article, we will delve deeper into other features to further improve typing efficiency.
And you will come to realize that this optimization is the true essence of the 40% keyboard.